
Startup Disk Full on Mac? Fix "Your Startup Disk Is Almost Full"
AskClean Team · Updated 2026-07-28
When your Mac warns that your startup disk is almost full, free space fast by emptying the Trash, clearing your Downloads folder, and deleting the largest files you no longer need — then go after System Data (labelled "Other" on older macOS), developer caches, and your Photos library for the big wins. This guide works through each step in order of impact.
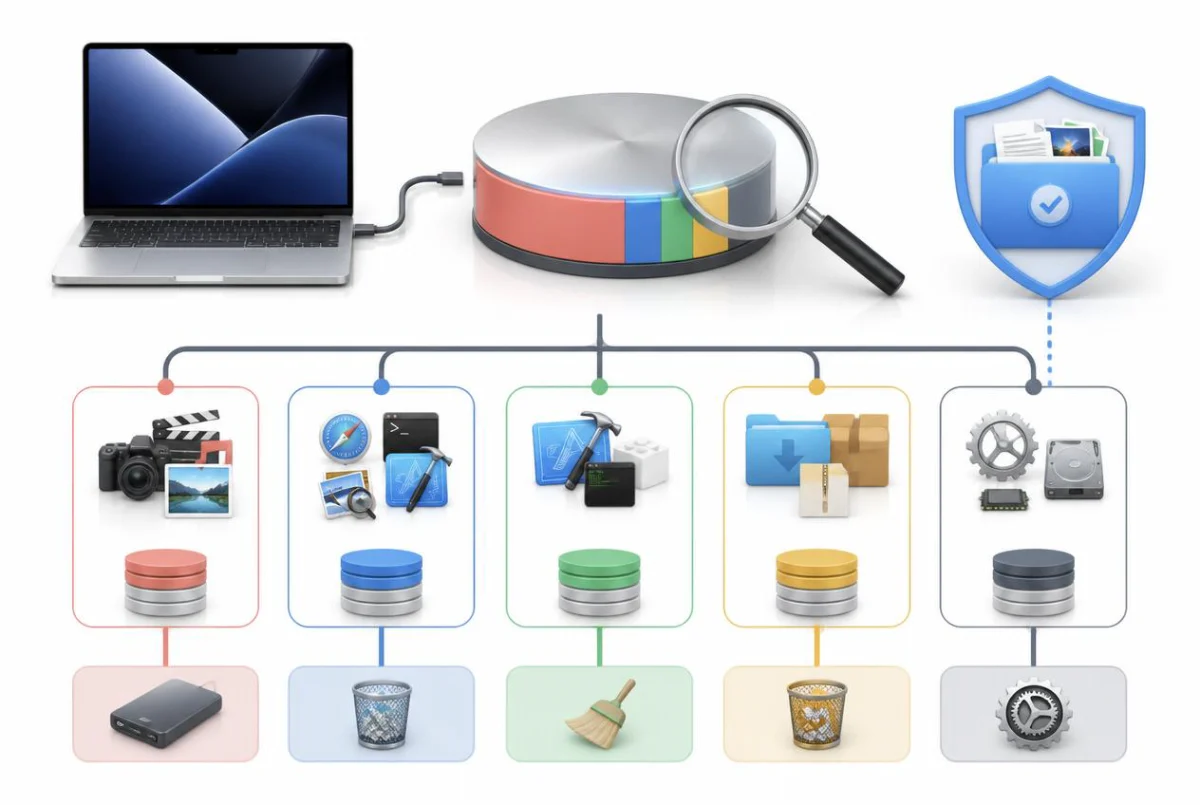
What "Your disk is almost full" actually means
The startup disk is the drive your Mac boots from and where macOS, your apps, and your user files all live. When free space on that disk drops to a critically low level, macOS shows the "Your disk is almost full" alert — and it is not just a suggestion. macOS needs breathing room on the startup disk for virtual-memory swap files, app installers and updates, temporary files, and the caches that keep everyday apps responsive. When that room runs out, things start failing in ways that do not obviously point back to disk space.
The symptoms of a nearly full startup disk are easy to misdiagnose: apps launch slowly or refuse to open, the spinning beach ball shows up constantly, macOS updates fail to download or install, saving a file throws an error, and in extreme cases the Mac will not finish booting at all. That is because macOS uses free disk space as an extension of RAM — when memory fills up, the system swaps data to disk, and a full disk leaves it nowhere to swap.
How much free space is healthy? Apple does not publish a single official number, but in practice you want to keep roughly 10-15% of the disk free, and never let it fall below about 20 GB on a modern Mac. macOS updates alone can require well over 20 GB of temporary space to install, and a machine running with only a few gigabytes free will feel slow long before it is technically full. One more thing worth knowing before you start: the Storage screen counts some space as "purgeable" — data like Time Machine local snapshots and iCloud-synced files that macOS will remove automatically when space is needed. That is why the free-space number in Finder and the one in System Settings sometimes disagree, and why deleting files does not always move the meter right away.
Which warning are you seeing? Every variant, decoded
Apple has reworded this alert several times, and the wording tells you which problem you actually have. "Your disk is almost full" is the modern macOS phrasing (Ventura and later). "Your startup disk is almost full" is the same warning on earlier releases, and it is still the phrase most people search for. Both mean the same thing: free space on the boot volume has fallen low enough that macOS wants you to act. The fix is everything below — delete files, clear caches, offload media.
"Your Mac OS X startup disk has no more space available for application memory" is a different alert, even though it names the startup disk. So is its modern successor, "Your system has run out of application memory." These are memory-pressure warnings: macOS ran out of RAM, tried to page data out to swap files on the startup disk, and found no room there either. The dialog usually lists the apps consuming the most memory and offers to force-quit them. Quitting the worst offender clears it immediately — but the underlying reason swap failed is still a full disk, so the cleanup steps below are what stop it from coming back.
Two more variants worth naming. Saving a document and getting "The disk is full" or error code -34 is the same condition surfacing at the file-system level rather than as a notification. And if macOS reports the startup disk is full within seconds of you deleting several gigabytes, you are almost certainly looking at purgeable space rather than a stale number — see the note at the end of the next section.
Quick wins: Trash, Downloads, and large files
Start with the moves that take minutes and free the most obvious space. The single most common mistake is deleting files without emptying the Trash — everything you "delete" in Finder still occupies disk space until the Trash is emptied, so gigabytes of freed space can be sitting one click away.
The Downloads folder is the next classic offender. Installers (.dmg and .pkg files), zip archives you already extracted, and email attachments you saved once and forgot are pure dead weight. A disk image is useless the moment the app inside it is installed; sort Downloads by size to measure what your own folder can return.
macOS also has a built-in large-file finder that most people never open. It lives in the Storage settings and lists your biggest files and downloads across the whole disk, sorted by size, with a delete button right there. Ten minutes in that list often recovers more space than an hour of browsing folders by hand.
- Empty the Trash: click and hold the Trash icon in the Dock, then choose Empty Trash. If you use Mail, also erase Mail's own trash (Mailbox > Erase Deleted Items) — deleted attachments count against your disk too.
- Open System Settings from the Apple menu, click General in the sidebar, then click Storage (on macOS Monterey, use Apple menu > About This Mac > Storage > Manage instead). Wait for the colored bar to finish calculating so the numbers are accurate.
- Under the recommendations, click the Info button next to Documents (or Applications), then open the Large Files and Downloads tabs. Sort by size, select anything you no longer need, and click Delete.
- In Finder, open your Downloads folder, choose View > As List, and click the Size column to sort largest first. Trash old installers, disk images, and archives you have already used.
- Back in the Storage settings, consider the built-in recommendations: Empty Trash Automatically removes items after 30 days, and Store in iCloud offloads files you rarely open (they re-download on demand).
- Empty the Trash one final time, then restart your Mac — a restart clears swap files and temporary folders, which can instantly return several extra gigabytes.
If the free-space number barely moves after all this, do not panic — macOS may be holding purgeable space (like local Time Machine snapshots) that it releases on its own schedule. The System Data section below covers the space you can reclaim yourself.
When the disk is so full you cannot delete anything
There is a nastier version of this problem: the disk is at 100%, and every escape route needs space you do not have. Finder refuses to empty the Trash, Storage settings never finishes calculating, apps quit on launch, and in the worst case the Mac stops short of the desktop. The order below goes from least to most invasive — stop as soon as you have a few gigabytes back, then run the normal cleanup.
Start with a restart. It is not folklore: rebooting discards swap files, /tmp, and a pile of per-session caches, and on a wedged disk it routinely returns several gigabytes — often just enough to make Finder cooperate again. If the Trash still will not empty afterwards, delete in smaller batches; a single enormous item can fail where ten smaller ones succeed.
Next, look at Time Machine local snapshots. macOS keeps hourly snapshots of the boot volume even when no backup drive is attached, and normally thins them on its own — but that automatic thinning assumes the system has room to work in, which is exactly what a 100%-full disk denies it. This is the one case where clearing them by hand is the right call, and Apple ships a supported command for it.
If the Mac will not boot at all, hold Shift during startup on Intel (or hold the power button, pick your volume, then hold Shift and click Continue in Safe Mode on Apple Silicon). Safe Mode skips login items and clears some system caches, which is frequently enough to get you to a usable desktop. If even that fails, boot into macOS Recovery — Command-R on Intel, hold the power button on Apple Silicon — run Disk Utility's First Aid on the volume, then use Recovery's Terminal or an external drive to move large files off before booting normally.
- Restart the Mac, then try emptying the Trash again — start with the largest items and work down in small batches.
- Open Terminal and run tmutil listlocalsnapshots / to see the local snapshots macOS is holding on the boot volume.
- Free them in one pass with sudo tmutil thinlocalsnapshots / 20000000000 4 — that asks macOS to reclaim roughly 20 GB at the most aggressive urgency level. Repeat with a larger number if you need more.
- Still stuck? Boot into Safe Mode (Shift on Intel; power button > volume > Shift > Continue in Safe Mode on Apple Silicon), empty the Trash there, and restart normally.
- If the Mac will not reach the desktop, boot macOS Recovery, run First Aid in Disk Utility, then copy your largest personal files (Photos library, video projects, Downloads) to an external drive and delete the originals.
Do not try to free space by deleting anything inside /System, /private, or /Library that you did not put there. Swap files and system caches are recreated instantly, and removing the wrong file turns a full disk into an unbootable Mac.
System Data — called "Other" on older macOS — is usually the biggest slice
If you have been searching for what the "Other" category on a full startup disk contains, this is it under a new name. Up to macOS Monterey the storage bar had a large gray wedge labelled Other; Ventura renamed it System Data without changing what it counts. Same slice, same causes, same cleanup — so advice written about "Other" storage still applies, you just look for System Data in System Settings now.
Once the quick wins are done, hover over the storage bar in System Settings > General > Storage and look at the light gray segment near the end: System Data. On most Macs with a full startup disk, this is the largest single category — 30, 50, sometimes 100+ GB — and it is also the most confusing, because it is not a folder you can open. It is a running total of app caches, logs, temporary files, virtual-memory swap, Time Machine local snapshots, old iPhone backups, and developer files scattered across the disk.
For a full-disk rescue, two targets inside System Data pay off fastest. The first is ~/Library/Caches: because apps rebuild their caches on demand, its largest folders can be cleared without losing anything permanent. The second is stale local device backups — if you have ever backed up an iPhone or iPad to this Mac, those snapshots may still be here years later. Check via Finder's Manage Backups button (select any connected device in the sidebar) instead of hunting for the folders manually, so the backup index stays intact.
What you should not touch: the swap files and local snapshots that macOS manages itself. Swap lives in a protected system area and is recreated as needed; local snapshots are automatically thinned by macOS when disk space runs low. Deleting things inside /System or /private is never worth the risk. System Data cleanup is a deep enough topic that we wrote a dedicated guide to it — "How to Clear System Data Storage on Mac" walks through every folder, path, and safety rule in detail. For a full-disk rescue, measure the largest cache folders and stale device backups before deciding whether they are worth removing.
Developers: Xcode and simulators are probably the culprit
If Xcode has ever been installed on your Mac, stop and check the developer folders before anything else — they are very likely the reason your startup disk is full. The single biggest offender is DerivedData, Xcode's folder of intermediate build products; after a few active projects it commonly holds tens of gigabytes, all of which Xcode regenerates automatically the next time you build. Deleting it costs you nothing but one slower first build per project.
Simulators come next. Each downloaded simulator runtime is a multi-gigabyte install, and every simulated device keeps its own data folder, so a Mac that has lived through several Xcode upgrades usually carries runtimes for OS versions nobody targets anymore. Two cleanups cover it: run xcrun simctl delete unavailable in Terminal to drop simulator devices whose runtimes are gone, then open Xcode's Settings > Platforms (called Components in older Xcode versions) and delete the old runtimes themselves, keeping only the latest per platform.
Add in the download caches kept by package managers — npm, CocoaPods, Swift Package Manager, Homebrew, pip, cargo — and developer storage can become one of the highest-impact categories on the disk. The result varies by machine. Our dedicated guide "Delete Xcode DerivedData & Developer Caches Safely" walks every path and command in detail, including archives and iOS DeviceSupport symbols.
Photos and videos: the space you actually care about
Media is different from caches: you cannot regenerate a photo, so this is where cleanup needs judgment instead of bulk deletion. Start by checking how big the problem is — in the Storage settings, the Photos category shows what your library occupies, and on many Macs it rivals or exceeds System Data.
The safest first move is deduplication. On macOS Ventura and later, the Photos app has a built-in Duplicates album (in the sidebar under Utilities) that finds exact and near-exact copies and merges them, keeping the highest-quality version. Beyond duplicates, the usual dead weight is screenshots, screen recordings, burst shots, and videos — a single 4K video can equal a thousand photos in size. In the Photos sidebar, the Media Types section breaks your library into Videos, Screenshots, and Screen Recordings — open each and review the biggest and oldest items first.
If you pay for iCloud, turning on Optimize Mac Storage in Photos settings keeps full-resolution originals in iCloud and only device-sized versions locally — often the single biggest space win on a media-heavy Mac, with nothing actually deleted. Just remember it is a sync service, not a backup: deleting a photo removes it from every synced device, and once its 30 days in Recently Deleted are up it is gone for good.
MacBook Air and 256 GB Macs: the small-SSD playbook
If your startup disk is full on a base-model MacBook Air or any 256 GB Mac, the arithmetic is against you before you save a single file. A current macOS install plus its bundled apps occupies somewhere in the 20-35 GB range, the 10-15% free-space buffer claims another 25-40 GB, and a major macOS upgrade wants 20+ GB of temporary room on top. On a 256 GB machine that leaves under 200 GB of genuinely usable space — which is why these Macs hit the warning with what feels like almost nothing on them. On a 128 GB Air the situation is tighter still, and the strategy has to shift from cleaning to relocating.
The highest-leverage move is getting your media off the internal disk. Quit Photos, drag the Photos Library from your Pictures folder to an external SSD, then hold Option while reopening Photos and choose the library in its new location (and set it as the System Photo Library in Photos settings if you use iCloud). The same applies to video projects, virtual machines, and sample libraries — anything large that you use occasionally rather than constantly. If you pay for iCloud, turning on Desktop & Documents Folders sync plus Optimize Mac Storage lets macOS keep only what you are actively using on the SSD.
Two things to accept on a small disk. Xcode plus several simulator runtimes, active-project DerivedData, and a media library can consume a large share of a 256 GB disk, so measure developer storage after each project and move suitable media to an external volume. And the internal SSD is not upgradeable on Apple Silicon Macs, so an external drive plus a monthly sweep is a long-term capacity plan.
Keep it from filling up again
A startup disk that filled up once will fill up again unless a few habits change. The good news is that prevention takes minutes a month, not hours.
First, make the built-in automation work for you: turn on Empty Trash Automatically in the Storage settings so deleted files stop lingering for months, and leave Optimize Storage on if you use Apple TV purchases or large Mail attachments. Second, adopt a monthly ten-minute sweep: empty Downloads, glance at the Large Files list in Storage settings, and — if you are a developer — clear DerivedData and run xcrun simctl delete unavailable after finishing a project.
Free scanning & preview Scanning, previewing results, and reviewing cleanup plans remain free. Running cleanup, compression, uninstall, or AI analysis now requires Pro. Confirmed disk-cleanup items are deleted permanently. Review each selection before continuing.
FAQ
I deleted lots of files but my free space didn't change. Why?
Three usual reasons. First, deleted files sit in the Trash and still count against your disk until you empty it. Second, macOS keeps Time Machine local snapshots that preserve deleted data for up to 24 hours — the space shows as purgeable and is released automatically when the system needs it. Third, the Storage screen can take a while to recalculate; give it a minute or restart your Mac and check again.
Can I delete swap files or purgeable space myself?
Swap files, no — they live in a protected system area, macOS recreates them immediately, and deleting them by hand can destabilize the system. Purgeable space is normally handled for you too: local Time Machine snapshots and offloaded iCloud files are reclaimed automatically the moment an app genuinely needs the room. The one exception is a disk that is already at 100%, where macOS has no working room to do that thinning — then sudo tmutil thinlocalsnapshots / 20000000000 4 is the supported way to force it, as covered above. Otherwise your effort is better spent on caches, backups, and large files, which macOS never cleans on its own.
What is the "Other" storage filling up my startup disk?
On macOS Monterey and earlier, "Other" is the gray wedge in the storage bar that holds everything Apple did not give its own category: app caches, logs, temporary files, virtual-memory swap, local Time Machine snapshots, old iPhone backups, disk images, and developer build folders. Ventura renamed the same category System Data. It is not a folder you can open, so you shrink it indirectly — measure the largest folders in ~/Library/Caches, review stale device backups via Finder's Manage Backups, and inspect Xcode DerivedData if you develop.
My startup disk is full and I can't even empty the Trash. What now?
Restart first — that discards swap files and temporary folders and usually returns enough space for Finder to work again, then empty the Trash in small batches rather than all at once. If it still fails, free the local Time Machine snapshots macOS is holding with sudo tmutil thinlocalsnapshots / 20000000000 4 in Terminal. If the Mac will not reach the desktop at all, boot into Safe Mode (hold Shift on Intel; hold the power button, pick your volume, then hold Shift on Apple Silicon), or into macOS Recovery to move large files onto an external drive before booting normally.
Why is my MacBook Air's startup disk full when I have barely any files?
Because a base MacBook Air has less usable space than the label suggests. macOS and its bundled apps take roughly 20-35 GB, a healthy free-space buffer needs another 25-40 GB, and a major macOS upgrade wants 20+ GB of temporary room during install. On a 256 GB Air that leaves under 200 GB for you, and System Data plus a Photos library eats it quickly. The fix on a small SSD is relocation rather than deletion: move your Photos library and video projects to an external drive, and turn on iCloud's Optimize Mac Storage so only what you are actively using stays local.
What does "your startup disk has no more space available for application memory" mean?
That one is about RAM, not files — despite naming the startup disk. macOS ran out of physical memory, tried to page data out to swap files on the boot volume, and found no room there either. The dialog lists the apps using the most memory; force-quitting the worst offender clears the immediate pressure. But swap also needs working room, so restore a meaningful free-space buffer with the measured steps in this guide.
Will an external drive fix a full startup disk?
It helps, but only for the right kind of data. Moving your Photos library, video projects, or archives to an external drive is a great way to offload hundreds of gigabytes. What an external drive cannot do is host the things that must live on the startup disk: macOS itself, swap files, and most app caches. So use one to relocate media and archives, but you still need enough free space on the internal disk — the 10-15% rule applies regardless of how large your external storage is.
How much free space should I keep on my Mac?
A practical rule: keep 10-15% of the startup disk free, with an absolute floor of about 20 GB. Below that, virtual memory gets cramped, macOS updates may refuse to install (major upgrades can need 20+ GB of temporary space), and everyday performance degrades. On a 256 GB Mac that means keeping roughly 25-40 GB free; on a 1 TB Mac, 100 GB or more is a comfortable buffer.
Does macOS free up space automatically?
Partially. When disk space runs low, macOS automatically thins local Time Machine snapshots, purges some caches and iCloud-synced files marked as purgeable, and manages swap on its own. What it never does is clear app caches that apps forgot about, old iPhone backups, developer build files, or your Downloads folder — those keep growing until you remove them yourself or use a cleanup tool.
Is it safe to use a cleanup app to fix a full startup disk?
Free scanning & preview Scanning, previewing results, and reviewing cleanup plans remain free. Running cleanup, compression, uninstall, or AI analysis now requires Pro. Confirmed disk-cleanup items are deleted permanently. Review each selection before continuing.
Sources